Wednesday, December 30, 2009

great cookbooks for new year's - recipe: ina garten's orange yogurt

Ok, I haven’t been cooking over the past few weeks. The only good part about not cooking is that our (ridiculously difficult to keep clean) stainless steel gas range looks spotless. It’s a rather busy time of the year for me work-wise, so we’ve been enjoying ready-to-bake meals from the shop all month. However, after New Year’s Eve, things will slow down a little bit so I’ll be able to get busy in the kitchen again. So I thought I’d share with you some of my favourite cookbooks, and the recipes within.

I own so many fantastic cookbooks; below are the four that I’d save first in a fire.

Martha Stewart’s Hors D’oeuvres Handbook,
(Martha Stewart, 1999) – I LOVE, LOVE, LOVE, this cookbook, so it’s hands down my numero uno. I love making hors d’oeuvres (my favourite type of party to cater) but I understand that not everyone enjoys making them, as they can be fiddly and time-consuming. That being said, if you’re like me and enjoy this type of thing, buy this book. It’s full of the most beautiful photos, recipes and stunning presentation ideas. I’ve flipped through this book over a hundred times and I never tire of it. Favourite recipe: Ruth Lesserman’s caramel brie with pecans.

Food and Memories of Abruzzo, (Anna Teresa Callen, 1998). David’s cousin Gabriella recommended this book. I love making dishes that David’s mother may have prepared for him when he was young. Favourite recipe: Polenta al Ragu di Maiale.

The Silver Palate Cookbook, (Julee Rosso & Sheila Lukins, 1979). I remember reading this over and over again in high school (my Mom had a copy) along with the original Martha Stewart “Entertaining” Cookbook. I daydreamed about what I’d serve at the cocktail and dinner parties I’d host in my own future apartment! Favourite recipe: chicken marbella – we had this last week on Christmas Eve at my brother’s in-laws (thanks Lynn & Mike!).

The Barefoot Contessa Cookbook, (Ina Garten, 1999). I adore this book as well, and if you saw my copy, you’d know just how much as it’s falling apart. I’ve considered buying a new copy but I think that there’s something special about a cookbook that is stained and tattered. It contains great photos, stories, and of course, recipes. Some of my favourite Ina Garten recipes include: crab cakes, pan-fried onion dip, rosemary white bean soup, coconut cupcakes, raspberry corn muffins, and orange yogurt.

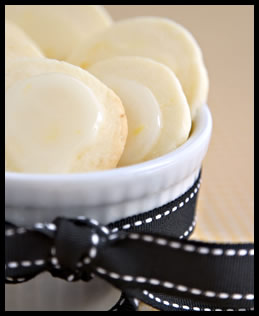
Since it’s almost 2010, I figure a healthy, yet delicious recipe would be the most appreciated. Ina Garten’s orange yogurt is to die for – it tastes like you’re eating something that can’t possibly be good for you, and yet it is!

Ina Garten’s Orange Yogurt

note: for best results, strain the yogurt the day before you want to enjoy it

ingredients

  • one quart plain low fat yogurt
  • one-quarter cup raisins
  • one-quarter cup chopped walnuts
  • one-and-one-half teaspoons pure vanilla extract
  • one-quarter cup honey
  • grated zest of one orange
  • one-half cup to one cup freshly squeezed orange juice
  • if desired, additional raisins, walnuts, and/or orange zest

method

  • Line a sieve with cheesecloth or good-quality paper towels and suspend it over a bowl. Pour the yogurt into the sieve and allow it to drain, refrigerated, for three hours or overnight
    (note: overnight is definitely best).
  • Place the thickened yogurt into a medium bowl and add the raisins, walnuts, vanilla, honey and orange zest to taste. Thin with orange juice until it is a desirable consistency
    (note: I prefer less orange juice so that it remains thick).
  • If desired, garnish with additional orange zest, raisins or walnuts.
  • Serve plain or topped with granola.

Wednesday, December 16, 2009

some great holiday (cheese) appetizers - recipe: haloumi cheese appetizer

If you’re hosting a holiday party and looking for a delicious appetizer idea, look no further. My latest food obsession and appetizer of choice, is halloumi cheese.

My first taste of halloumi was in Zingerman’s Deli (Ann Arbor, Michigan). It was served on a bed of greens with chicken, olives and tomatoes. If you haven’t heard of Zingermans, my all time favourite food shop/deli/restaurant/bakery/creamery (among other things) try: www.zingermans.com.

Back to business: halloumi is a slightly salty firm cheese from Cyprus. It’s soft, but holds its shape when grilled on the bbq (my method of choice in warmer months) or sautéed in a frying pan (when the bbq is covered in ice & snow, like this past week). You can find this cheese at Zehrs; the President’s Choice brand is called Halloom. It is quite good and reasonably priced. I was delighted to find a delicious version at Melitsa’s, a fabulous Greek deli/café in Belmont Village.

preparation

The preparation is simple:

  • Slice the cheese into one-quarter inch thick disks and sauté over medium-high heat in a frying pan for about 1-2 minutes per side.
  • Place each disk/slice of cheese on a piece of baguette or gourmet cracker, and finish with a squeeze of lemon and fresh ground pepper (do not season with salt as it’s already naturally salty).
  • If I have any on hand, I also love to sprinkle chopped rosemary, or mint, or thyme leaves on top.

Here are some other great cheese appetizers:

  • Cut a wedge of asiago into large chunks, then blitz in the food processor into smaller chunks/pieces. Add a handful of chopped parsley, some minced garlic and chopped sundried tomatoes in oil. Spread this mixture onto baguette slices and bake in a 350º F oven until cheese is hot and bread is slightly toasted, about 8 minutes.
  • Top a wheel of brie with your favourite chutney, jam or preserves. Bake in 375º F oven (preferably in a brie baker – the latest and greatest gift to give your hostess, or yourself… yes, we sell them at my shop!) until the brie is melted, about 12 minutes (for an approx. 200 gram wheel). Serve the warm brie with fresh bread, crackers and biscuits.
  • Make your own cheese crisps. Simply preheat oven to 400º F and line a baking sheet with parchment paper. Grate some fresh parmesan and make little “disks” of parmesan cheese about one-and-one-half inches in diameter (leave space between the disks as if you were making cookies). Bake the crisps in the oven for about 12-15 minutes, or until the cheese is melted and medium-golden in colour. Cool on a wire rack and serve at room temperature (do not refrigerate, they’ll get soggy).

Wednesday, December 2, 2009

an old-fashioned meal needs a good dessert - recipe: chocolate mousse

Every year around the holidays, my husband’s best friend, Alex, treats his three brothers, his closest friends and their significant others to an over-the-top meal. The dinner always takes place at Barberian’s, a steakhouse that’s an institution in Toronto.

David and I have been together for eight years, but this year was the first time that I was also able to attend, as I didn’t have an event to cater that night.

Where do I start?

Both the night and the meal were memorable. We were greeted by the maître d’ who took us down to the lower level of the restaurant… nope, not a scary basement space, but the private wine cellar!

There are two levels — we were in the upper, more intimate dining space, completely surrounded by floor to ceiling wine racks, overlooking their two-storey high main wine vault… incredible.

To make me even happier — among the fifteen guests were a couple married just two weeks earlier, a two-month old baby to hold, and an expectant mother. We started with cocktails and appetizers — think lobster bisque, Caesar salad and shrimp the size of pancakes (no joke).

The menu was extremely traditional, in a good way – I don’t think it’s changed since it opened in 1959! It even has an “after 10 theatre menu for two” with classics like baked Alaska and crepes Suzette.

On to dinner. Amazing wines were shared, and in addition to the meal that each guest ordered (me: a bacon-wrapped filet mignon, as this 8 oz. steak was their smallest; David: a 16 oz. rib-eye steak), Alex ordered a slew of side dishes for us all to share — three whole lobsters, sautéed mushrooms, the best deep-fried onion rings I’ve ever had (David is still talking about them), pickled vegetables, amazing garlic toast and more.

Believe it or not, we all saved room for dessert. I ordered their famous hot apple beignets (donuts) with vanilla ice cream, David ordered the cheesecake and surprise, surprise, Alex ordered a round of desserts for everyone to share on top of their own (it’s like he knew we all had such a hard time deciding).

Their frozen chocolate éclair, caramel cheesecake and signature house chocolate mousse made the rounds. The chocolate mousse was delicious and was actually served in a little house made of chocolate.

As you can imagine, we all felt like royalty that night. I did my best to eat like a pauper the next day! Thanks to our generous friend, Alex, for an incredible meal and experience.

This week’s recipe is for chocolate mousse — unusual because it is made with olive oil, which makes it even creamier. As you can imagine, it’s rich so you don’t need to serve a lot.

chocolate mousse

ingredients

  • 200 gram Masters Choice swiss milk chocolate
  • 1/3 cup RALO olive oil or masters choice olive oil
  • 1 envelope unflavoured gelatin
  • 2 tbsp water
  • 3 egg yolks
  • 1/4 cup sugar
  • 3 egg whites
  • 1/4 cup sugar
  • 3/4 cup whipping (35 per cent) cream
  • fresh mint, for garnish

method

  • Soften gelatin in water.
  • In a large heatproof bowl over simmering water, melt the chocolate.
  • Slowly stir in the olive oil until smooth. Then add gelatin.
  • Remove from heat. With a mixer at medium speed, beat egg yolks and 1/4 cup sugar until pale yellow and creamy.
  • With mixer at low speed, slowly mix the chocolate-oil mixture into the yolks.
  • Beat egg whites until they form soft peaks.
  • Gradually beat in 1/4 cup of sugar and continue beating until stiff peaks form. In a separate bowl, beat whipping cream until stiff peaks form.
  • Gently fold 1/3 egg whites into the chocolate mixture. Add remaining whites until almost combined. Gently fold in whipped cream and combine. Cover with plastic wrap and chill for three hours.
  • When set, scoop out into small bowls and garnish with additional whipped cream and/or a sprig of mint, if desired.

Wednesday, November 18, 2009

smoked salmon perfect for sandwich, pizza - or class - recipe: smoked salmon tartare on crisp potato rounds

Last week I had the pleasure of teaching an appetizer cooking class at Household China. The class was named “Shortt Bites” and I had quite a BLAST teaching it!

Several years ago, while a student at George Brown Chef School in Toronto, I assisted chefs who gave cooking classes at Upstairs at Loblaws and Dish Cooking Studio. It was a fabulous way to network, pick up a lot of handy tips and tricks, and of course, eat! It was a perfect job for a starving student like me. Well, allow me to rephrase that – perfect for a broke student who was determined to still eat well!

As an assistant in Toronto, I had to shop for the grocery items, prep the food, assist the chef during the class and don’t forget take care of all of those dishes! So what a pleasant surprise last Thursday evening when I arrived at Household China to find the grocery items purchased, the food prepped (perfect mise en place, Thanks Donna-Marie!), two accomplished assistants and one friendly dishwasher ready to help me all evening!

The class went off without a hitch – we worked our way through five recipes: warm cheese olive bites (recipe can be found on my website: www.danashortt.ca/recipes ); coconut shrimp with ginger tamarind dipping sauce (recipe also on my website); date rumaki (medjool dates stuffed with chèvre and almonds and wrapped in hickory bacon); savoury French toast with baked brie and red pepper jelly; and smoked salmon tartare on crisp potato rounds.

This smoked salmon recipe is easy and elegant and can be used in other applications (try some spread on a flatbread or pizza shell topped with goat cheese, in a wrap, folded into an omelet, or used as a gourmet sandwich filling)

smoked salmon tartare on crisp potato rounds

note: recipe can be halved

yield: about seven dozen hors d’oeuvres

ingredients

  • eighteen ounces smoked salmon, diced
  • one-quarter cup capers, rinsed and chopped
  • one shallot, peeled and minced
  • two to three tablespoons chopped fresh dill, plus more for garnish
  • one teaspoon cracked black pepper
  • zest of a lemon
  • the juice of half a fresh lemon (may need more)
  • good-quality olive-oil (one or two drizzles)
  • herb potato crisps (two to three bags)
  • full fat sour cream, crème fraîche or Devon cream, for garnish

method

  • Combine all of the ingredients and toss gently.
  • Check the seasoning, add more pepper or lemon juice, if necessary.
  • Place a small dollop (about 1 teaspoon) of smoked salmon mixture on top of each potato round.
  • Top salmon mixture with a small dollop of sour cream, crème fraîche or Devon cream and a sprig of fresh dill.

Wednesday, November 4, 2009

celebrating an anniversary with lamb meatballs - recipe: moroccan lamb meatballs (or burgers)

Hard to believe, but I’m celebrating my baby’s fifth birthday this week.

No, not Johnny’s b-day (my son, who’s not yet two) but my shop’s birthday.

The shop was born (OK, opened) in 2004.

I jokingly refer to it as my first baby, because starting a new business is very demanding, requiring constant time and attention (much like an actual baby).

And accordingly, nurturing a new business provides an amazing sense of accomplishment.

It’s incredible to see what’s possible with hard work, care, attention. . . and help from a supportive family, friends and great employees.

This week’s recipe is an item from our original full-service catering menu.

Five years later, it’s one of the few items that still remain on our current menu — a testament to just how popular an appetizer it is.

These Moroccan lamb meatballs are great to pass around at a party — and I know from my years in catering that meatballs and shrimp are always the first appetizers “to go”, no matter how undemanding or sophisticated the crowd.

Note: an easy summer substitute is Moroccan lamb burgers.

Please join us on Nov. 6 and Nov. 7 for our customer appreciation anniversary sale, happening at my shop on 55 Erb St. E. in Waterloo.

Thank you so much to the DSG team and to our loyal customers who have become friends.

moroccan lamb meatballs (or burgers)

makes about 40-50 small meatballs (or 12 burgers)

ingredients

  • 5 pounds lean ground lamb
  • 1 to 2 tablespoons olive oil
  • 1 pound cooking onions, finely diced
  • 2 tablespoons garlic, minced
  • 1 tablespoon salt
  • 2 teaspoons allspice
  • 1 tablespoon cumin
  • 2 teaspoons cinnamon
  • 2 tablespoons fresh mint, finely chopped
  • 2 eggs, beaten
  • 1 cup dried currants
  • 1 cup breadcrumbs

method (meatballs and burgers)

  • Heat oil in skillet over medium heat and sauté onions until soft and light golden in colour, about 7–9 minutes.
  • Add garlic and sauté until fragrant, about two minutes.
  • Add salt, allspice, cumin, and cinnamon and cook for another two minutes, stirring well. Cool.
  • Place lamb in large bowl. Add cooled onion mixture, currants, mint, eggs and breadcrumbs.

method for meatballs

  • Preheat oven to 350 degrees F.
  • Form lamb mixture into small meatballs.
  • Place meatballs on a parchment lined baking sheet.
  • Bake in oven until cooked throughout, about 18-25 minutes (time will vary, depending on the size of the meatballs and your oven) Serve with a spiced yogurt sauce, if desired.

method for burgers

  • Shape lamb mixture into roughly seven-ounce patties.
  • Preheat grill to medium-high heat. Grill for about seven to nine minutes on each side or until a thermometer reaches an internal temperature of 160 degrees.

Wednesday, October 21, 2009

sweet treat from a blushing bride - recipe: caramel corn

Although it’s been over three hours since I left the wedding of our good friends Shawn & Jessica, I’m still a little choked-up. It was an amazing, teary-eyed (in a good way!) celebration of their love and commitment to each other.

I adore attending weddings – even if I don’t know the bride and/or groom. My favourite part of a wedding celebration by far (even more than the food) is the speeches. I’m so glad that David remembered to stuff his pockets with Kleenex for me this afternoon! So many beautiful, heartfelt sentiments, such loving family and friends - it was a privilege to attend.

Shawn and Jessica had a relatively short engagement – as Jessica’s sister Suzanne said today; “When you meet someone that you want to spend the rest of your life with, you want the rest of your life to start right away.” They’re so perfect for one another, why wait?

At Jessica’s bridal shower a few weeks ago, she gave each of her friends a personalized card, outlining all of the qualities that she admires most in us and how those personality traits inspire her to have the best life possible with Shawn. In addition to the card, she also gave each of us a bag of her famous caramel corn, which she learned to make from her grandmother. Yes, Jess truly is this thoughtful.

Congratulations to my dear friends Shawn and Jessica – may your life together be as sweet as Grandma’s caramel corn!

jessica's caramel corn

ingredients

  • seven quarts popped popcorn
  • two cups brown sugar
  • one cup butter
  • one-half cup corn syrup
  • 1 teaspoon salt
  • one-half teaspoon baking soda
  • one-half teaspoon pure vanilla extract

method

  • Preheat oven to 250º F.
  • Boil sugar, butter and corn syrup in a saucepan over medium-high heat for about 4 minutes.
  • Remove saucepan from heat and add the salt, baking soda and the vanilla. (The mixture will foam when the baking soda is added).
  • Pour the caramel over the popped corn and stir carefully.
  • Put popcorn onto a large pan into the oven and bake for 20-40 minutes, stirring every 10 minutes or so (note: if you want really chewy popcorn, don’t put it in the oven at all).
  • Crumble as it cools

Wednesday, October 7, 2009

roasted veggies a quick little way to help a busy family - recipe: simple roasted broccoli

OK, a confession — my kitchen is probably feeling a little bit lonely lately. I haven’t been cooking as much as I usually do.

I’m juggling catering events, catching up with clients, training new staff to gear up for our Christmas season and trying to maintain a semblance of a social life (what’s that again?). That’s in addition to never-ending household chores and spending quality time with my husband and son.

What else is new? Well, David is back to working full-time — he’s finished his parental leave, and my little guy is learning the ropes (OK, the building blocks) at daycare, so it’s definitely been an adjustment for all three of us.

Along with takeout pizza, we’ve been enjoying our fair share of Dana Shortt Gourmet entrées from my shop. What I’m preparing at home, however, are easy and healthy veggie side dishes to serve alongside all of these ready-for-us mains.

As of September, I began my obsession with roasting vegetables. I actually crave them during the day. Almost every evening, I roast something. It could be cauliflower, carrots, squash, tomatoes, onions, roma beans, fennel or my favourite, broccoli.

The technique is so simple — cut the washed veggies to your desired size, dry, drizzle with olive oil, sprinkle with salt and pepper and roast in a hot oven until the vegetables are crisp tender and the edges are caramelized. I love the taste of the “frizzled” broccoli florets and the darkened stalks. Little Johnny will even eat broccoli prepared this way for breakfast!

A quick reminder, Dana Shortt Gourment’s second annual charity bake sale is Oct. 7 from 10 a. m. to 4 p. m.

All profits will go to Family and Children’s Services of the Waterloo Region. If you have a moment, please drop by the shop to support this worthy organization.

simple roasted broccoli

ingredients

  • 1 large bunch broccoli (cut the florets into two-inch pieces and the stalk into one-inch pieces)
  • olive oil (note: I use the garlic oil featured in my July 1, 2009 column)
  • salt and pepper

method

  • Preheat oven to 425º F.
  • Wash the broccoli.
  • Cut the florets and stalk into small pieces (note: if you decide on larger pieces of broccoli, you will need to roast it longer).
  • Dry the broccoli pieces with paper towel.
  • Place broccoli on a rimmed baking sheet and toss with olive oil (note: each piece of broccoli should be covered in a thin coating of oil).
  • Sprinkle with salt and pepper.
  • Bake in oven until the broccoli florets are frizzled and stalks are lightly golden in colour; about 17-23 minutes (the time will depend on your oven and the size of your broccoli pieces).

Wednesday, September 23, 2009

pumpkin muffins capture the flavour of the season - recipe: pumpkin raisin muffins

There are so many things that I love about our new home and neighbourhood. 1. We’re on the same block as my brother and sister-in-law!!! 2. Our new home has an upper floor “media room” which we’re using as a big playroom for John. 3. We are steps away from a school. 4. I now have a gas stove!!! 5. There are lots of kids in our new neighbourhood. Did I mention that I now have a gas stove?

It’s so nice to be surrounded by young families and children. I’ve met many friendly Moms (and Dad’s) while out walking with John. I was recently invited to our first “play date” in the area. Of course, I wanted to bring something with me but I wasn’t quite sure what would be appropriate. I decided on pumpkin raisin muffins – I picked up a sugar pumpkin a few days before at the market and was ready to bake on Saturday morning just before the play date. Long story shortt, John slept-in past 7:30 a.m. (a miracle!) and there was NO way I was waking him up with a racket in the kitchen. Thank goodness for canned pumpkin! Turns out the hostess of the play-date also baked muffins – Kelly’s blueberry coffee cake muffins were fantastic! It was great to start out the friendship with a common bond – food!

This pumpkin muffin recipe is courtesy of guess who, my Mom. However, I took her original higher-fat recipe and reduced the oil from one-and-a-half cups down to half a cup with the addition of a few more eggs. I also reduced the amount of sugar so they aren’t as sweet.

pumpkin raisin muffins

yields: about 20 small muffins

ingredients

  • three cups all purpose flour
  • two teaspoons baking powder
  • two teaspoons baking soda
  • two teaspoons cinnamon
  • one-and-one-third cups sugar
  • one cup raisins
  • one-half cup vegetable oil
  • five eggs
  • two-and-one-half cups pumpkin

method

  • Preheat oven to 350º F
  • Mix together flour, baking powder, baking soda, cinnamon, and sugar in a large bowl and whisk to combine. Add in raisins and stir.
  • In a separate bowl, whisk together eggs, pumpkin and oil until combined.
  • Using a wooden spoon, mix wet ingredients into dry ingredients. Do not over-mix as that will result in dry muffins.
  • Spoon mix into paper muffin liners that have been coated with non stick spray.
  • Bake in 350º F oven for about 30 minutes.

    Note: a handful or two of sweetened shredded coconut and a half-cup of chopped dates make for a tasty twist.

Wednesday, September 9, 2009

'Shortt’ but sweet family visit nets a new dessert - recipe: Zia Maria's Amaretti

We just returned from a ‘short but sweet’ visit to Thunder Bay. My hubby David’s family lives there – his relatives were delighted to meet our little John. We had a great trip – plenty of visiting and LOTS of great eats!

My father-in-law, Rocco, is a fantastic cook. The night we arrived, he treated us to one of David’s favourite dishes – Italian sausage with chili-garlic romano bean & potato mash. All I can say is that it is now one of my favourites, too! The night before we left, Rocco made his famous fettucini with tomato sauce and meatballs. It was amazing! I think it’s rather fortunate that both David’s and my family share such a great love of food.

We also had a visit with his Zia (Aunt) Maria. It was such a wonderful afternoon! John delighted in playing in her beautiful back yard (she has the vegetable garden OF MY DREAMS). As John played, we nibbled on delicious antipasti that she lovingly prepared – think roasted red peppers with basil, handmade cured sausage, fresh bread with preserved olive spread and melon. Dessert? Espresso with her famous just-sweet-enough cookies – cranberry almond biscotti and my favourite, Amaretti.

Thanks goes to Gabriella Sacchetti, Maria’s daughter, for the recipe.

Amaretti (Italian Almond Chews)

makes about 30 cookies

ingredients for cookie

  • one-quarter cup egg whites (about 2 egg whites)
  • one cup sugar
  • one-and-one-half tablespoons pure almond extract
  • two-and-one-half to three cups whole, unpeeled almonds
  • one-quarter cup flour

ingredients for topping

  • About 30 whole, unpeeled almonds (note: reserve for topping, do not grind)
  • one egg white, beaten in bowl

method

  • Preheat oven to 375 F.
  • Line two cookie sheets with parchment paper and spray with cooking spray (do not skip this step, otherwise the cookies will stick to the paper)
  • Finely grind the whole, unpeeled almonds in a food processor. Measure about two-and-a-half cups into a mixing bowl. Reserve an additional half-cup of ground almonds, in case needed (see below). Add flour to mixing bowl with two-and-a-half cups ground almonds.
  • In a large glass measuring cup, beat the egg whites, sugar and extract well using a whisk.
  • Combine egg white mixture to flour-ground almond mixture. The mixture should be completely mixed but dry (think of wet sand at the beach that can be shaped and will hold its shape). This is the stage where you may need to add more of the reserved half-cup of ground almonds if needed, until the texture reaches the desired consistency.
  • Scoop out one tbsp size portions onto a plate, dip your fingers in the egg white mixture to lubricate your palms and form the portions into rounded balls and place on the parchment paper. Press a whole almond into the top of each cookie, pointy end first. Each ball will be slightly pressed, but will continue to spread slightly when baked.
  • Bake in the middle rack for 15-17 minutes – you want a slight colour on the edges, but the centre should remain chewy.
  • Buon appetito!

Wednesday, August 26, 2009

perfect fall-off-the-bone ribs are a favourite birthday treat - recipe: fall-off-the-bone ribs

I celebrated my birthday last week. In my family, it’s tradition for my mother to prepare our choice of dinner for our b-day get-togethers. It’s always a tough decision – Mom is a great cook and I have so many favourites! This year, I decided on her fall-off-the-bone pork back ribs.

These ribs are effortless and delicious. Many people boil their ribs to ensure tenderness, but the method of cooking them “slow and low” in an oven really does work. It’s easy – all you have to do is cover the ribs with thin slices of lemon, set them on a roasting rack in a roasting pan (with the lid on) and cook them slow (over a long period of time) and low (in a low temperature oven). About twenty minutes before serving, brush the ribs with bbq sauce, turn up the heat and bake them uncovered for a few more minutes.

Our family friend, Helen Howatson, gets the credit for this recipe/method. These delicious, ridiculously easy to prepare ribs have been a hit with everyone I’ve ever served them to. In fact, this was one of the first meals that I made from my husband, David, when we were both living in Toronto. His apartment kitchen was absurdly tiny – I’m not exaggerating when I say that there was about sixteen inches of counter space – not a lot prep room! So, these ribs were the perfect choice, all I had to do was bring over my own roasting pan.

David was impressed – he had no idea how easy they were to make and was amazed that I could create something so delicious in his minuscule kitchen! I served them with regular baked potatoes, but Mom prefers to serve baked sweet potatoes with crumbled goat cheese. I highly recommend this combo – the tangy, creamy goat cheese pairs wonderfully with the sugary sweet potato.

Back Ribs (serves about 4)

ingredients

  • two racks pork BACK (not side) ribs
  • two lemons, thinly sliced
  • your favourite bbq sauce

method

  • Preheat oven to 300 F.
  • Place ribs on roasting rack in large roasting pan. Pour about one cup of water into the bottom of the roasting pan (water should not touch ribs). Cover entire surface of ribs with thin slices of lemon. Cover roasting pan with tight fitting lid (or use tinfoil if you don’t have a lid or if the lid isn’t tight fitting).
  • Cook ribs in oven for 4 – 6 hours or until very tender. Remove ribs from oven and remove lemon slices. Turn oven up to 375 F. Brush ribs with your desired amount of bbq sauce.
  • Put ribs back into the (375 F) oven, uncovered for about 15-25 minutes or until hot. Alternatively, brush with bbq sauce and grill on the bbq.

Wednesday, August 12, 2009

fruity pavlova is a sweet summer treat - recipe: Barb Wurtele's Pavlova

Early last week, I returned home from work to find two large meringues on my kitchen counter, heavy cream and fresh strawberries in my fridge, along with a voice mail message from my (super sweet) mom. She decided to surprise me with the makings of what would soon be a delicious pavlova. All I had to do was whip the cream, slice the berries, and assemble.

Pavlova consists of one or more meringue layers sandwiched and/or topped with whipped cream and fruit. The dish was created and named in honour of the Russian ballerina, Anna Pavlova, who toured Australia and New Zealand in the 1920s. The jury’s still out on whether an Aussie or Kiwi can be credited with the first recipe.

Mom’s been making Pavlova for years. The “never fail meringue” recipe comes from our dear family friend, Barb Wurtele. Mom is partial to the strawberry version, but I also love it with tropical fruit. We’ve even made it with chopped-up Skor bars. It’s delicious, but I think I prefer the fruit versions.

My fifteen-month-old son John loves it too. Last week was his first taste. The poor guy has been teething pretty badly and he hasn’t had much of an appetite. Desperate to get him to eat something, I mashed up a small scoop of the pavlova with some plain yogurt. John ate every last spoonful. I felt sort of guilty about the sugar, but then my Mom reminded me that the meringue has protein (egg whites), fruit (berries) and cream (dairy). Grandma knows best, right?

ingredients: meringue

  • 4 large egg whites at room temperature
  • 1 cup sugar
  • 1 1/3 teaspoons vinegar
  • 1 teaspoon vanilla
  • 1 1/3 teaspoons water

ingredients: pavlova

  • 1 cup heavy whipping cream, 35 per cent
  • sugar and vanilla to taste (for the whipped cream)
  • fresh fruit of your choice

method

  • Preheat oven to 400 F
  • Beat egg whites until really stiff. Then add all other meringue ingredients and beat again until stiff.
  • Line two baking sheets with lightly greased parchment paper.
  • Divide meringue in half and form two nine-inch circles about the same size (one for each cookie sheet).
  • Place meringues in the oven and immediately turn off oven. Leave meringues in oven overnight (I suggest that you attach a note to the oven that reads: “do not turn on”).
  • In the morning, remove the meringues from oven and loosen from parchment paper. Whip heavy cream until soft and billowy, adding sugar and vanilla to taste. Spread half of the whipped cream onto one disc of meringue, and top with half amount of fresh fruit. Place second meringue on top, spread with remaining whipped cream and fresh fruit. This can be made in the morning for serving at dinner.

Wednesday, July 29, 2009

christening a new home with crepes - recipe: crepes with crispy bacon, syrup & cinnamon

We recently moved. I loved our former almost-a-century-old house and cherish the memories of our four years there. Although we put a lot of TLC into making it a home we were proud of and reluctant to leave; it shrank overnight after our son John’s arrival. It’s amazing how much stuff babies “need”: activity centre + playpen + jolly jumper + vibrating chair + swing, (all on a smallish living room floor) = clutter & disarray.

Like any move, the first few days were chaotic and stressful. Our focus was on unpacking, not on cooking gourmet meals! I was hoping to “christen” my new kitchen by concocting a fabulous five-course meal complete with wine pairings… Yeah, that didn’t happen, what was I thinking?

I still wanted our “first” meal in our new home to be special, so I gave David two options: 1. spaghetti with aglio olio e peperoncino – recently his new favourite meal, or 2. crepes with bacon, syrup & cinnamon. David chose the crepes – a dish that his mother, Palmina, used to make for him.

David loves the combo of the soft warm crepe with salty crisp bacon, oozing silly-sweet corn syrup and dry spicy cinnamon. He is adamant that each of the three fillings is crucial to the success of the dish. David insists that the syrup be corn syrup – he won’t even substitute pure Canadian maple syrup – he claims it doesn’t contrast well enough with the other ingredients and "interferes" with the cinnamon – whatever that means... He only gets this passionate about a few things, usually food!

I however much prefer these crepes with maple syrup (sorry hun, but you’re not going to win this one). Just before any special day, I am guaranteed to hear David say; “Honey, I don't want or need anything, so please don’t buy me a gift, all I want is for you to make the crepes for me, o.k.?”

This recipe is awesome – you don’t have to let the batter sit (like most crepe recipes). I don’t own a crepe pan, I just use a simple non-stick skillet. We usually have these for breakfast or brunch but sometimes breakfast-for-dinner works too!

Palmina’s Crepes with Crispy Bacon, Syrup & Cinnamon

makes about eleven, 8 inch crepes

ingredients

  • three eggs
  • two cups milk
  • one cup flour
  • one-half teaspoon salt
  • one teaspoon vanilla
  • three tablespoons melted butter or vegetable oil (plus extra to coat pan)
  • one 500 gram package bacon, cooked until crispy and then roughly chopped into ½” pieces
  • corn syrup or maple syrup, to taste (let me know which you prefer!)
  • cinnamon, to taste

method

  • Combine eggs, milk, salt, vanilla, butter (or oil) into a large bowl and whisk to combine. Add flour in two or three additions and whisk until well blended and batter is smooth (you can also use a blender).
  • Heat an 8” or 10” skillet over medium-high heat and brush with melted butter or oil to coat pan. Pour a small amount of batter into skillet (about one-quarter cup), immediately swirling and tilting to coat bottom. Cook until crepe loosens from side of skillet and underside is pale golden, about two minutes. Flip crepe and cook the other side for about one minute or until pale golden. Continue to make more crepes in the same manner.
  • Place crumbled bacon, a drizzle of syrup and a sprinkle of cinnamon in the centre of each crepe and roll “burrito” style.

Wednesday, July 15, 2009

wine, cheese, old friends and new memories - recipe: shawn mcintyre's warm cheese olive bites

Once a month or so, David and I get together with my brother, Adam, my sister in law, Michelle, and our good friends Rob, Kim, Shawn and Jessica.

We meet after dinner for drinks and appetizers (thank you to the grandparents for those of us with children) and chat the evening away.

It’s such a treat that I look forward to it every month — lots of laughs and good cheer are guaranteed.

Because of our busy work and social lives we try to meet on weeknights. This makes it easier for the four couples to co-ordinate schedules and puts a “cap” on the evening so that we all get home relatively early, ready to cheerfully face the next morning.

The last gathering was particularly special because our dear friends Catherine and Rob were visiting from Australia and were able to join us.

Rob is like a brother to me and Adam and Rob are best friends. Growing up, our families spent a lot of time together. Rob’s mom is Ruth Bricker. I featured her Swedish Nut recipe back in December. Catherine and I met at the University of Guelph and were roomies for a few years, so we have plenty of history as well.

The homecoming dinner

To celebrate their homecoming, Adam, Michelle, David and I decided to co-host the gathering and serve dinner as well as appetizers. It was a “sneaky” way to buy a few more hours to spend visiting with them.

To start we served two appetizers. The first was Michelle’s famous nacho dip, accompanied by my baked brie with spicy strawberry compote.

Dinner was barbecued burgers, roasted veggies tossed in garlic scape pesto, smashed fingerling potatoes (drizzled with the garlic olive oil that I wrote about in my July 1 column) and strawberry almond salad.

Simple dessert caps off the night

We kept things simple and passed around a box of Rheo Thompson Candies famous “mint smoothie” chocolates for dessert.

It was such a great night. I laughed so hard that by the end of the evening it felt like I had done a thousand sit-ups (Rob is a paramedic and has a litany of “colourful” stories to share).

The hard part is always saying goodbye — although David and I are now more determined than ever to save up for a trip “down under”.

It’s our turn to host the next get together and I’m already starting to plan which appetizers I’ll serve. You could call it an occupational hazard, I guess.

Cheese is always a hit and goes great with the wine! Below is a recipe for Shawn’s famous cheese olive canapés, which are always the first of the appetizers to be gobbled up!

Shawn McIntyre’s Warm Cheese Olive Bites

(makes about six dozen - note: recipe can be doubled)

ingredients

  • 250 gram package “MacLaren’s” sharp spreadable cheddar cheese, slightly softened (You can find this cheese in the dairy section of a grocery store, near the cream cheese, butter, yoghurt, etc. It comes in a red plastic container with black printing.)
  • 1/2 pound butter, softened
  • 1 3/4 cups of all-purpose flour
  • 1/4 teaspoon salt
  • a couple pinches of cayenne pepper (optional)
  • One 750 mL jar of pimento-stuffed green olives
    (I used stuffed manzanilla olives when I was testing the recipe)

method

  • Knead all ingredients (except for the olives) well and chill dough in fridge for about an hour.
  • Drain and pat the stuffed olives until dry.
  • Break off pieces of dough and roll around the olives to coat them completely. I used about 1 teaspoon of dough per olive but you can use more if you choose.
  • Chill olives before baking.
  • Preheat oven to 400 degrees and bake on an ungreased baking sheet for eight to 14 minutes.
  • How long you bake the olives will depend on your oven.
  • Serve warm—preferably to good friends and family!

Wednesday, July 1, 2009

some Italian treats that made the 'Shortt’ list - recipe: aglio olio e peperoncino

In May, to celebrate a milestone birthday of my mother’s, she and dad treated the family to a wonderful trip to Italy. We spent a week in Rome and a week touring around Tuscany. It was an extraordinary experience full of breathtaking scenery, gracious people and of course, incredible food!

I could fill a whole newspaper with details of our epicurean adventures, but I’ve narrowed down our highlights to the following Shortt list:

Pizza! We had delicious take-away pizza in Tuscany and an incredible roasted red pepper & basil pizza in Rome. Italians tend to go easy on the toppings –typically one or two toppings on each.

Tuscan bread soup. It’s quite thick – more like a stew than a broth. This soup is one of Tuscany’s most famous dishes; full of beans, vegetables, potatoes, kale and of course, bread. The best thing I ate on the trip was a bowl of this soup in a charming trattoria in Montepulciano.

The AutoGrill. A café/convenience store chain next to some gas stations along major highways. Oddly enough, the coffee was some of the best we enjoyed in Italy. You won’t find hamburgers and fries on their menu. They sell pastries, gourmet sandwiches, fresh salads and fruit along with the more typical snack foods. You can even buy a mini bottle of wine to enjoy with your meal! Talk about civilized! One of the AutoGrill’s we visited even featured separate “marché style” stations: primi (antipasti & formaggi), secondi (pasta & risotto), grilia (meat) and pizza stations!

The Coop grocery store. At “our” Coop (in Bagno di Gavorrano) the cheese and meat selection was out-of-this-world and everything was cut fresh-to-order. I was finally able to experience authentic ‘Mozzarella di Bufala’ – fresh buffalo milk mozzarella. In Tuscany, we ate most of our lunches at restaurants but enjoyed most of our dinners back at the villa. One dish that made many appearances at the dinner table was a buffalo milk mozzarella and sliced tomato salad drizzled with olive oil and fresh torn basil.

Gelato! Need I say more? I was amazed at the number of coffee and gelato shops – they are on every corner. My favs – Nutella (truly an Italian ‘staple’) and coconut. We found the Nutella gelato at ‘Antica Gelateria de Matteis’ near the Colosseum in Rome (the owner’s from the same town as David’s grandmother, and all of their gelato is made in-house).

Spaghetti with aglio olio e peperoncino (spaghetti with garlic, olive oil & chili or hot pepper flakes). For lunch in the city of Massa Marittima, we shared four different entrées. This simple pasta dish was by far the best. It was David’s favourite entrée on our trip so I promised I’d make this for him back home. (Note: With this oil topping, David prefers the slightly thinner spaghettini over the more traditional spaghetti. He also "insists" on freshly ground pepper over the pasta just before serving it.)

The oil from this dish is outstanding – we like it so much that we’ve been drizzling it on everything but dessert! In addition to tossing it with spaghetti, try drizzling this “sauce” onto pizza, eggs, grilled vegetables, toast with tomato, and/or smashed potatoes.

aglio olio e peperoncino

ingredients

• 2 cups (two cups) olive oil
• 25 (twenty five) garlic cloves (about one cup),
peeled and thinly sliced
• ½ - 1 (one half to one) teaspoon hot pepper flakes
• coarse salt, to taste

method

  • Heat oil in a large sauté pan over medium-low heat.
  • Add one or two pieces of garlic to the oil to test its temperature – a few bubbles should rise to the surface, but it shouldn’t make a lot of noise nor brown the garlic – if this happens, your oil is too hot and you need to turn the temperature down and wait a few minutes before trying again. (Note: if you add the garlic to oil that’s too hot, it will burn and taste bitter and you’ll have to start over from scratch!)
  • When the oil is at the correct temperature, add the garlic and stir for about a minute.
  • Add the hot pepper flakes and stir to combine.
  • Turn the heat to low and let simmer for about 20-25 minutes, stirring occasionally. The oil should taste of garlic and the garlic should be soft and sweet tasting when ready.
  • Season to taste with coarse salt.

Wednesday, June 17, 2009

a pork dish even dear old dad can make - recipe: pork calvados

I recently made a rather impromptu trip to see my Uncle Dorian (Uncle Do) and Aunt Jan at their home in Owen Sound. They’d been encouraging a visit from my son, John, and I for quite some time. We’d been trading potential dates for months, but when a weekend was freed up for me at the last minute, the timing just happened to work for all of us. After a two-and-a-half hour drive (I got lost en route – I had to stop at a farm for directions!), Uncle Do treated me to a bowl of steaming hot mussels swimming in an herb-tomato-white wine broth. Luckily John stayed asleep in his car seat for the duration of the trip, likely due to a lot of praying on my end.

My uncle Do (my father’s younger brother) is an incredible cook. I know I use the word ‘incredible’ a lot, but I do really mean it. Whenever I think of him, I picture him in the kitchen, smiling, stirring (and tasting!) the day away. As clichéd as this might sound, I can state with certainty that his principal culinary “secret” is cooking with love.

About a year ago, Do and Jan renovated their kitchen. Simply stated, it’s a cook’s dream. I sure am envious! (I have a lot of quesadilla’s to sell before I can afford a kitchen like that!)

We all get excited when we know that Do is cooking (and when Jan is baking – I will definitely be writing a column on her baking one day). Some of his “signatures” include: seafood linguine; mussels; roasted meats (following the mussels, Dorian served a herb-crusted rack of lamb with his famous curried apple-cranberry rice and asparagus); chicken cacciatore; glazed ham and scalloped potatoes; and “hot pot” (it’s an English thing, you’ll need to watch Corrie St. to fully comprehend…).

Dorian’s “signature” dish is Pork Calvados – pork tenderloin simmered in a silky, rich apple brandy cream sauce. My Aunt Jan is one of those people who “forgets to eat” but even Jan adores this dish. Uncle Do serves it with steamed rice and asparagus – delish.

I hope my Dad doesn’t mind me writing this, but he isn’t much of a cook (aside from breakfast). It’s not that Dad’s a bad cook per se, it’s just that he doesn’t have time for it with his busy schedule.

However, the stars must have been aligned the night of my 13th birthday, because for some reason, my Dad found some inspiration, called his brother Do and got the recipe for Pork Calvados. He prepared this for my birthday dinner, and it is such a special memory for me (especially considering that this was the last time Dad cooked dinner – honestly – and I’m turning thirty-two this August!) I hate to say it, but if my dad, Dave Shortt, can do it, anyone can! (no offence, Dad).

Uncle Do’s Pork Calvados

serves 4, but this recipe doubles or triples well

note: Calvados (French Apple Brandy) is an expensive investment considering you only need three tablespoons for this recipe. You can substitute regular brandy if desired or, if you’re on good terms with your Hungarian neighbour, ask to borrow some of their alma palinka.

I suggest that you serve the pork with sauteed apples for an extra kick of apple flavour, especially if you use regular brandy.

ingredients for pork

*
1 1/2 pounds pork tenderloin, cut into 3/4 inch slices
*
2 tablespoons butter
*
salt and pepper to taste

ingredients for sauce

*
1 tablespoon butter 6 ounces mushrooms, sliced
*
3 tablespoons Calvados (apple brandy) or regular brandy
*
1/2 cup chicken stock
*
1/2 cup, 35 per cent whipping cream
*
2 teaspoons cornstarch

to garnish

*
1/3 tablespoon toasted coarsely chopped hazelnuts, optional
*
1-2 teaspoons each chopped fresh thyme and parsley

method

*
Preheat oven to 350º F.
*
Sprinkle pork slices with salt and pepper.
*
Melt 2 tablespoons butter in a large skillet over medium heat.
*
Add pork slices.
*
Saute until lightly browned.
*
Transfer to a 2-quart casserole dish.
*
For sauce, add 1 tablespoon butter to skillet.
*
Add mushrooms, saute gently for 2-3 minutes.
*
Add Calvados, chicken stock and salt and pepper to taste.
*
Boil mixture 2 minutes.
*
Pour sauce mixture onto pork.
*
Cover casserole with lid or foil.
*
Bake in a preheated oven for 20 minutes or until pork is cooked and tender.
*
In a small bowl, combine the cream and cornstarch.
*
Stir cornstarch mixture into hot casserole.
*
Bake 5 or 10 minutes until sauce is thickened.
*
Combine hazelnuts with herbs and sprinkle over top of casserole.

catering, gourmet food shop, gift baskets